You don't need anything connected to your Arduino for this sketch. It just runs through some of the structures that are needed to open and use the serial monitor with the IDE.
Step 1:
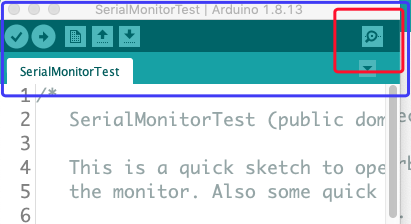
In the top right corner of the your sketch window is the 'button' for opening the serial monitor. You can also find it in the Tools drop down menu.

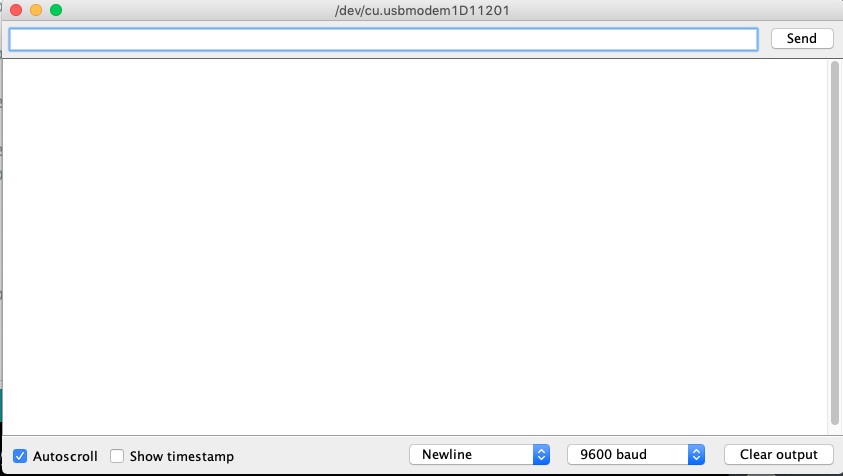
When you open your serial monitor you will get a window that looks something like this.

Step 2: Upload the Code (and Save As!):
Here's the code for exploring the serial monitor. Upload it and open the serial monitor. You only need the Arduino connected to your computer. Look at how the print statements in the sketch are written and what shows on the serial monitor. Notice the difference between Serial.print() and Serial.println(). The 'Serial.' begining to the command identifies that this is an predefined command that is used for serial communication. When the monitor asks for an input you type it into the input bar at the top of the monitor window and hit return. Explore what happens when you forget to hit return, what happens if you give it nothing, what happens if you give it a letter instead of a number, what happens if you give it a number before it asks for one. Explore and notice!!
If you want to look more deeply: Notice that the last number is either 'last' if it's an integer or 'numbr' if it's a decimal (float) value. You can comment out the integer lines and uncomment the float lines (2 lines in each case) to see the difference.
/*
   SerialMonitorTest (public domain)

   This is a quick sketch to open the serial monitor and write information to
   the monitor. Also some quick tools to enter numbers into the monitor.

   This statement in the setup() loop initializes the serial monitor.
   Serial.begin(9600); //Setting baudrate at 9600

   It takes a couple of moments to get the serial monitor communicating (like a phone call)
   so this next statement makes everything wait until the monitor is connected.
    while (!Serial) {
      ; // wait for serial port to connect. Needed for native USB
     }
   7/6/20
   Bruce Emerson
*/

int last = 6;
float numbr = 6.;

    void setup() {
     Serial.begin(9600); //Setting baudrate at 9600
     while (!Serial) {
      ; // wait for serial port to connect. Needed for native USB
     }
     Serial.println();
     Serial.println("The Serial Monitor is ready for business!");
     Serial.println();
     delay(2000);
     }

    void loop() {
     Serial.println("The following is an example of Serial.print()");
     Serial.print("1,  ");
     delay(300);
     Serial.print("2,  ");
     delay(300);
     Serial.print("3,  ");
     delay(300);
     Serial.print("4,  ");
     delay(300);
     Serial.print("5,  ");
     delay(300);
     Serial.println(last);
//     Serial.println(numbr);
     delay(5000);

     // This section requests a new final digit for the series above
     Serial.println("New last digit? ");
     delay(5000);

     //This checks to see if the user has entered something on the top line of
     // the serial monitor and hit return. Explore what happens if you don't hit
     // return or don't enter a number for more than 5 s
     if (Serial.available()){
       last = Serial.parseInt(); // the input can be parsed into a floating pt also
 //      numbr = Serial.parseFloat(); // the input can be parsed into a floating pt also
       }
     }
Step 3: Done!
Questions? Here is the manual page for the Serial Monitor from the folks at Arduino. Lots of things I haven't explored at the bottom.
