Purpose:
Since we have a week where we have no formal lab due to the MLK holiday it seems like this would be a good time to get you all started on installing and learning how to open a Freemat file (filename.m). I am aware that Freemat is no longer being developed and I will be moving to GNU Octave over the next year or so. Installing Octave, particularly on Mac's, is much more complex than Freemat so until I work out a way to make that complexity more manageable we'll stick with Freemat.
Procedure:
There is a lot to do here depending on how experienced you are with software and programming. Here are the steps you are going to try to get through before next week. Installation instructions (very simplistic), tutorials, and files that you need can be accessed from the PH211 Software Resources page.
You will need to download this zipped file (HelloBruce1.0.m.zip) for this lab:
Task I:
Your basic task for this week is to install Freemat on your personal computer or find a computer you have access to that has it. The only COCC computers that I know of that have it are locked in the physics lab but they are available during the week if a faculty member will pull one out for you. Otherwise installing the software on your own machine is much preferable.
The installation instructions are on the Software Resources page (see above) that you can access from the PH211 homepage. Go to the Freemat installation link which will take you to the sourceforge site where you can download the software. For me, the first link under the download heading has been successful at autodetecting which version of the software I need. If you have difficulties let me know.
Every group of students is different but I am often surprised at how many students have not actually installed significant open source software on their computers. Commercial apps tend to have well developed installers that make this easy but the open source world is a little less simple sometimes. If you have never done this before find a friend with some experience to help walk you through it. So far Freemat has continued to install successfully on iOS, Windows 10, and various Linux distros.
Task II:
For some of you this task will be simple and for others it may be new. Compressed files are not just for reducing file size but also for transfering active code between users. A compressed (zipped) file will not execute immediately when you download it. This protects the receiver of the potentially active computer code. All Freemat files like the one linked above are active code and the college email server will remove them from an email unless they are zipped. So far so good. In order for you to access the Freemat file you must 'unzip' the .zip file. For most computers this is as simple as double clicking and away we go. Your computer will find the appropriate software to unpack the zip file and then you can copy the files to where ever you want (just don't leave them in your download folder!). In the attached zip file you should eventually find a HelloBruce1.0.m file.
Task III:
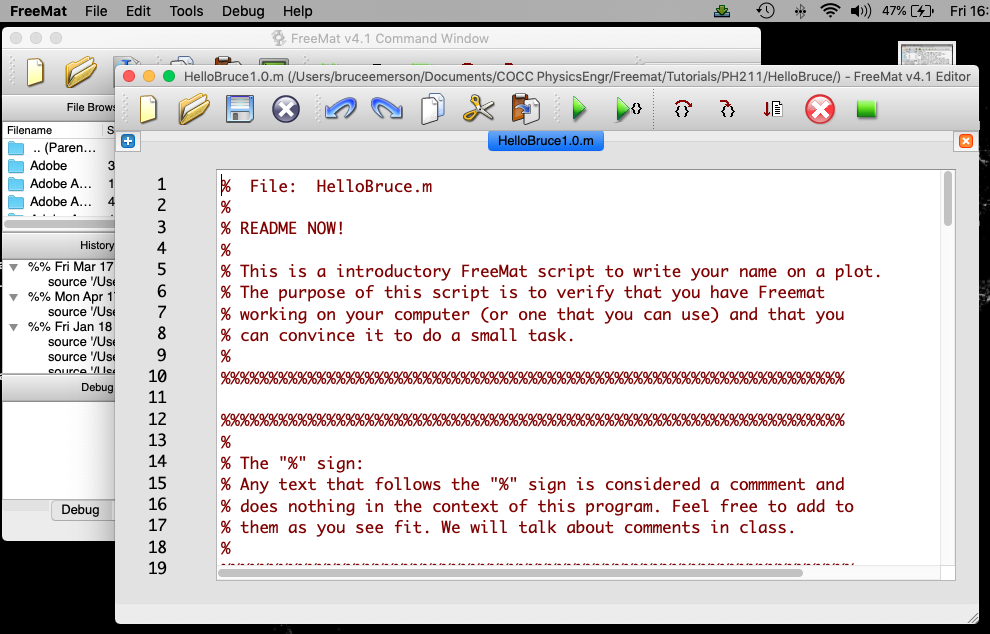
When you start up Freemat after you have installed it a command window should open that looks something like this (I run a Mac in my real life so there will be differences for Windows users but they should be minor):
This command window is a relatively primitive version of an IDE (Interactive Development Environment) which is how the software and the code you write communicate with you. You can type various mathematical commands following the cursor (→) in the right hand window and it will execute them for you. This is not generally what we will do but it is a capability Freemat has.
If you go to the File dropdown menu you can open a Freemat file in the usual way. Open the HelloBruce.m file that was in the zipped folder. When you do Freemat will open an additional window that looks something like this next screen shot (the command window will stay open):
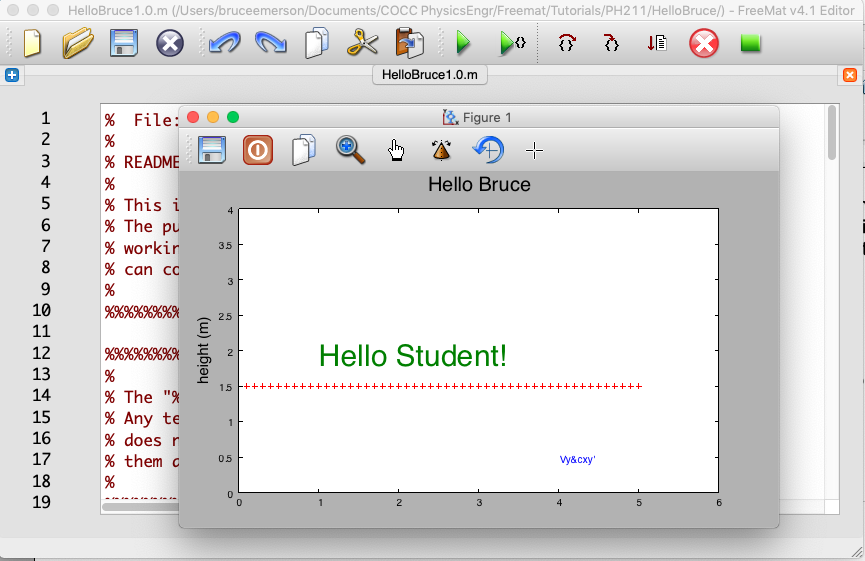
The new window is the coding window for Freemat. Save the file (save as) to some similar name so you are working with a copy of the original in case anything goes wrong. I have heavily commented this very simple code to hopefully guide you through what the various statements mean or do. Your task is to follow through the code reading all the comments. Eventually you will find where the 'Hello Student!' text is created. Your last task is to change the 'Student' to your name and add an extra exclamation point. Save the file and rerun it to produce a plot with your name on it. This plot can be saved as a jpg image which you can email to me to show that you have completed the activity.
At the top of the coding window you will see two green arrows ( > and >{}). If you click the left green arrow Freemat will execute the code which will create a plot in it's own window that looks like the next image below.
Drag the plot window off to the side so you can click in the coding window and work there but see what's happening to the plot.
Task IV:
Your task is to follow through the code reading all the comments. Eventually you will find where the 'Hello Student!' text is created. Your last task is to change the 'Student' to your name and add an extra exclamation point. Save the file and rerun it to produce a plot with your name on it. This plot can be saved as a jpg image which you can email to me to show that you have completed the activity.
There are lots of other features of this simple program that you can play with if you want. You can change the plot ranges, axis labels, font sizes, and plotting marks. Feel free to do so but they are not required for this activity.

- Lab Deliverables:
- 1) The only deliverable is an email with the .jpg of your plot with your name substituted for Student and an extra !.
